Create a distribution group
Distribution groups let you reach multiple users in your organization with one email address. They're great for when you have multiple projects or departments — just use one email address to send announcements or meeting invites.
This video is part of the How-To series for setting up email.
Required: You need admin permissions to create distribution groups. For more info, see admin roles from Microsoft.
- Sign in to your Email & Office Dashboard (use your GoDaddy username and password).
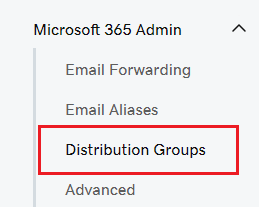
- On the leftmost side, select Microsoft 365 Admin, and then Distribution Groups.
- Select Add Distribution Group.
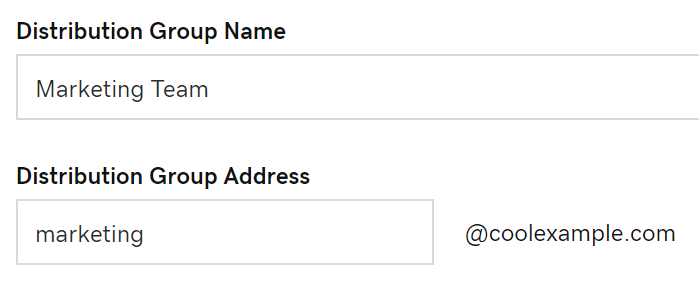
- Enter your Distribution Group Name.
- Enter your Distribution Group Address.
- Turn on the toggle if you want users outside of your organization to send email to this group.
- Select the checkbox next to a user's name to add them to the group.
- Select Save. Your new distribution group is ready to go.
If you see an error, please wait an hour and try again. Or, admins can create distribution groups in the Exchange admin center (EAC). Find out more about creating distribution groups in the EAC from Microsoft.
You can add, ![]() edit or
edit or ![]() delete distribution groups anytime.
delete distribution groups anytime.
Related steps
- Change or delete a distribution group
- Add shared (or external) contacts to a distribution group.
- Find out how to send email as a distribution group from Microsoft.
More info
- Create an email alias to diversify your account without having to pay for multiple inboxes.
- Compare forwarding, aliases, distribution groups and shared mailboxes